HOW TO USE OUR PRODCTS
Learn how to effectively use your devices and products to maximize your results.
How to use Everlift:
- Start with a clean face.
- Apply a generous layer of Everglow Serum to activate electrical currents and ensure a smooth glide. Reapply whenever necessary. Pro tip: Apply to one area at time.
- Push the ON/OFF button and wait for a beep.
- Select your preferred intensity. Pro tip: Choose what is comfortable for you. Some areas of your face may feel comfortable with a higher intensity than others.
- Starting on one side of your face, keep both spheres in contact with your skin and slowly glide the device upward and outwards, holding at the end of each glide until you hear a beep.
- Repeat each technique 3x on each side.
- Massage in any of the excess serum.
- Clean metal spheres with a soft damp cloth and store away in the provided carrying bag.
Pro Tip: Before getting started, make sure to charge your device for 4 hours. For best results, use for at least 5 minutes, 3-5 times per week.
How to use OmniGlow:
- Start with a clean face.
- Place the microcurrent prongs into the face piece of the device. (Optional)
- Connect the face and neck pieces together and plug both into the remote controller. (Optional)
- Plug into the outlet you will be nearest to and power up the device.
- Make sure to adjust the elastic headband to fit your head comfortably.
- If using the Microcurrent prongs on the face piece, apply a layer of the Evertone Everglow Serum.
- Turn on the LED lights and Microcurrents (optional) with the remote controller. You will be using the remote controller to control the LED light colors, intensity, and the microcurrent intensity.
- Set the LED color for your specific skincare issues and set the intensity of the microcurrents (to what feels comfortable to you).
- For best results, leave the mask on for 30 minutes with on LED color.
- After your mask treatment, apply a layer of the Evertone Everglow Serum to re-hydrate your skin.
- Wipe down the inside of your mask with a soft damp cloth and let dry before storing away.
Pro Tip: If the microcurrent prongs don’t feel comfortable, remove the two prongs from the forehead.
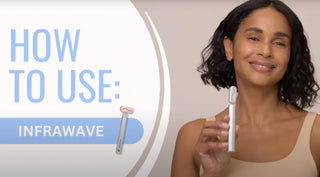
How to use Infrawave:
- Start with a clean face.
- Apply a generous layer of the Everglow Serum.
- Adjust the wand’s head to your desired angle.
- Gently press the wand against your skin to activate.
- Glide upwards and outwards on your face, including under your eyes.
- Wipe down the wand with a soft dry cloth and make sure all serum is removed before storing away. If you need a deeper clean, wipe with a soft damp cloth.
Pro Tip: Before getting started, make sure to charge your device for 4 hours.Use once daily for 5 minutes. This is great to add to your morning routine to de-puff face and under eyes.
How to use Eversmooth:
- Shave and thoroughly cleanse the areas you will be treating.
- Make sure the glass on the device is clean.
- Press and hold the button on the back to turn on the device. A green light on the back and a blue light on the front will turn on.
- Using the same power button, adjust the intensity as needed.
- Hold the device against your skin. A pink light will turn on the indicate it is ready to use.
- Press the big rectangular button on the front of the device to activate the flash.
- Move slowly to treat the area of concern.
Pro Tip: Use the device once a week for the first twelve weeks, then once every two months. Avoid tanning beds and direct sunlight 4 weeks before, during and after your IPL treatments and always wear sunscreen. Be sure to follow our skin tone and hair color chart to ensure that IPL is right for you.


How to use Lumipulse
- Start with a cleansed face, focusing on making sure your under eyes are free from any product.
- Carefully and gently peel the white backing on the back of the patch. This will expose the adhesive side. Try to avoid touching the adhesive, if possible. Place the adhesive side onto the patches and press down firmly to adhere. Next, peel the clear plastic and save it for later. Pro Tip: Each gel adhesive patch can be used up to 10 times. Make sure you wipe down the eye patches before applying new adhesive gels.
- Position the patches under the eyes, and hold the silver button to turn on the patches. Pro Tip: Find a level that works for you: Blue Blinking Light = Red Light Therapy only. This is great for anyone that may have more sensitive skin. Blue Solid Light = Red Light Therapy + Low EMS. Feels very comfortable under the eyes. Yellow Solid Light = Red Light Therapy + Medium EMS. May be comfortable for some users. This is a perfect setting for smile lines. Red Solid Light = Red Light Therapy + High EMS. This is the perfect setting for forehead wrinkles.
- For maximum results, wear the eye patches for 10 minutes. The patches will automatically turn off after 10 minutes. If you choose to manually power off, hold the silver button for 3 seconds to turn off.
- Place the eye patches back into their charging case, and make sure to cover them with the clear plastic you saved earlier.
- When you are ready to charge your patches, connect the included charging cable to the outside of your case and into a USB charging port.
Pro Tip: Before getting started, make sure to charge your device for 4 hours. Use it on your smile lines and forehead lines to soften their appearance.


